Using KeepassXC to manage SSH keys
It’s a good practice to create one SSH key for each server or service that you
want to use. (Yes, even for your GitLab/GitHub account). This way if your key
is compromised only one server gets compromised and not all of them. This can be
a bit tricky to manage, but you can use an SSH config file, specifying the
IdentityFile parameter for each host and it will become easier.
The only problem is that you need to specify a different password for each key.
If you store them all together under ~/.ssh/ and have the same password for
all of them, and your computer gets compromised (and your password), all of them
are compromised. So it defeats the purpose of having one key for each service.
So I needed to use a password manager for storing all the passwords, and I thought why not use the password manager also for managing the keys? Turns out you can. Let’s meet KeepassXC.
KeepassXC is a fork of KeepassX written in C++ with the QT Framework, which brings lots of features and it’s compatible with Keepass and KeepassX databases1. One of its many features is the SSH Agent integration, that makes it able to manage your ssh keys.
I learned how to set it up yesterday and I thought: “Cool, let’s write it down, so I won’t forget it”. So here is the blog post.
Configuring KeepassXC for SSH Agent Integration
The first thing you need to do us to open KeepassXC and go to Tools > Settings. In the settings window click on SSH Agent, and then tick the checkbox that says Enable SSH Agent (requires restart).
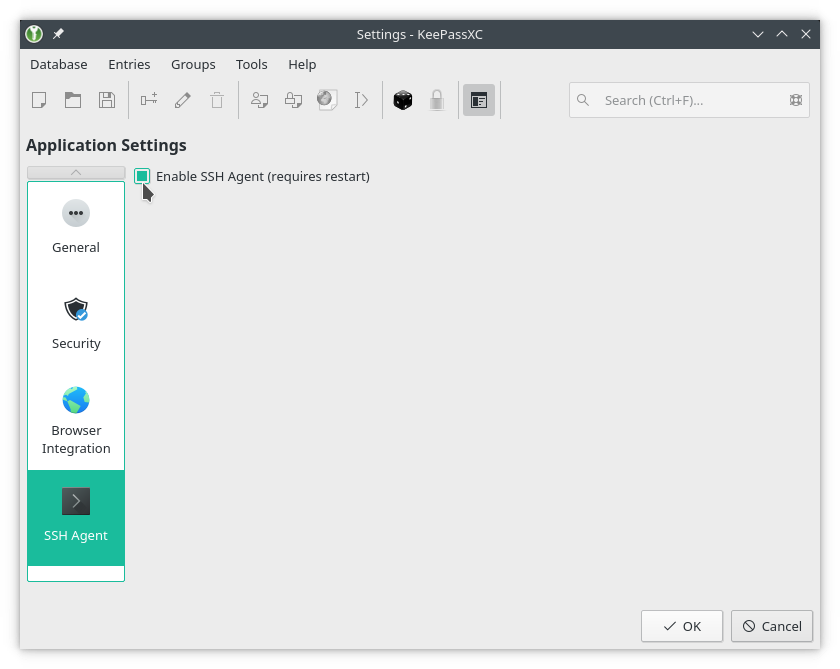 Enabling SSH Agent Integration
Generating some ssh keys and adding them to KeepassXC
Before adding the keys for our servers, we need to create them. Generating them
is as simple as using the ssh-keygen command. You can create an RSA key as
follows:
$ ssh-keygen -C "user@somecoolserver.com"
Generating public/private rsa key pair.
Enter file in which to save the key (/home/user/.ssh/id_rsa): .ssh/id_rsa_somecoolserver
Enter passphrase (empty for no passphrase):
Enter same passphrase again:
Your identification has been saved in .ssh/id_rsa_somecoolserver
Your public key has been saved in .ssh/id_rsa_somecoolserver.pub
Use the -C flag to write your own comment. By default, this will be yourUser@hostname,
where the user and the hostname are the ones from the local machine that you used
to create the keys. However, that doesn’t help at all when someone is looking at
the authorized keys on a server, or when you are reading the list of keys
represented by the agent.
You could save your keys in the default path, or specify a new path or name during
creation. In the example before, the keys were created with the name id_rsa_somecoolserver.
Of course, you should always use a strong password and you could generate it with
the password generator from KeepassXC. (Okay, maybe not for your LAN-only Kodi
box, but it doesn’t take much effort to use a strong password).
You can also specify the type of key using the -t flag. For example for creating
an ED25519 key (the ones recommended by GitLab)2:
$ ssh-keygen -t ed25519 -C "Some useful comment"Now that you have your keys, and you added them to your server (or GitLab/GitHub account), it’s time to create a new entry for them in your KeepassXC database:
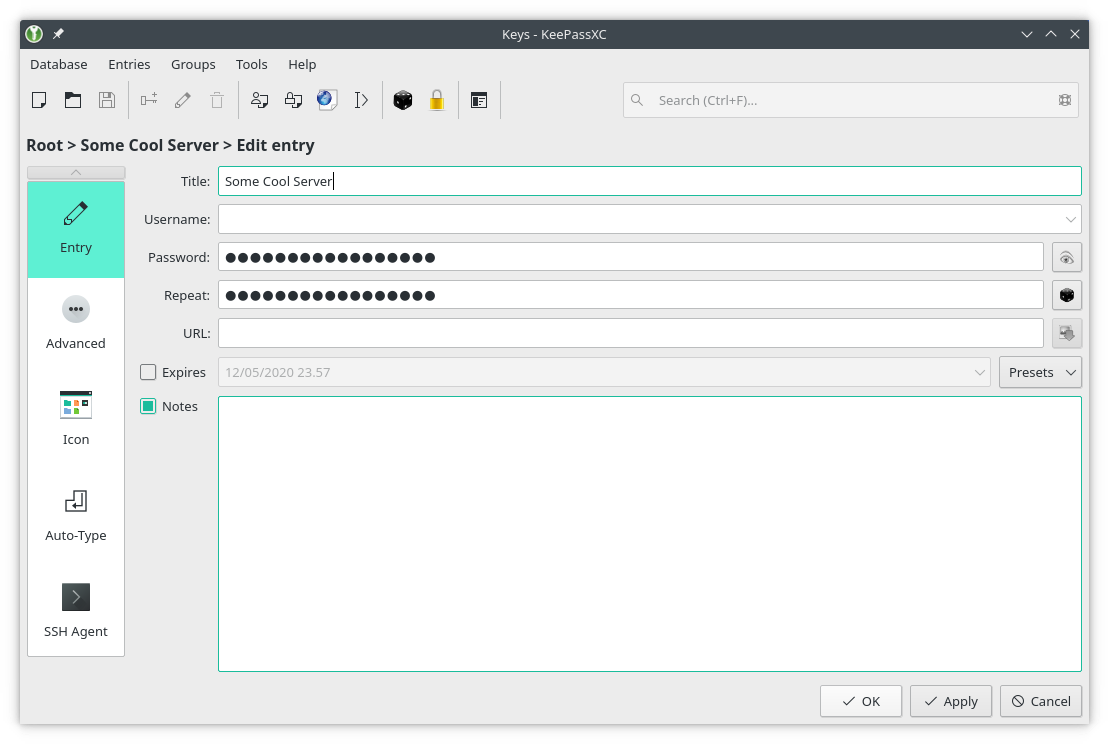 Adding a new key
If it makes it easier for you to remember, you could add the username and the URL of the server, but the SSH Agent won’t use them.
You may keep your key files as an external file if you want to store your keys in some specific place, for example in a USB Flash drive that you always carry around your neck; or you may add them as an attachment to the entry in the database. Remember that you’ll only need the private key, as the public key gets generated with the private one:
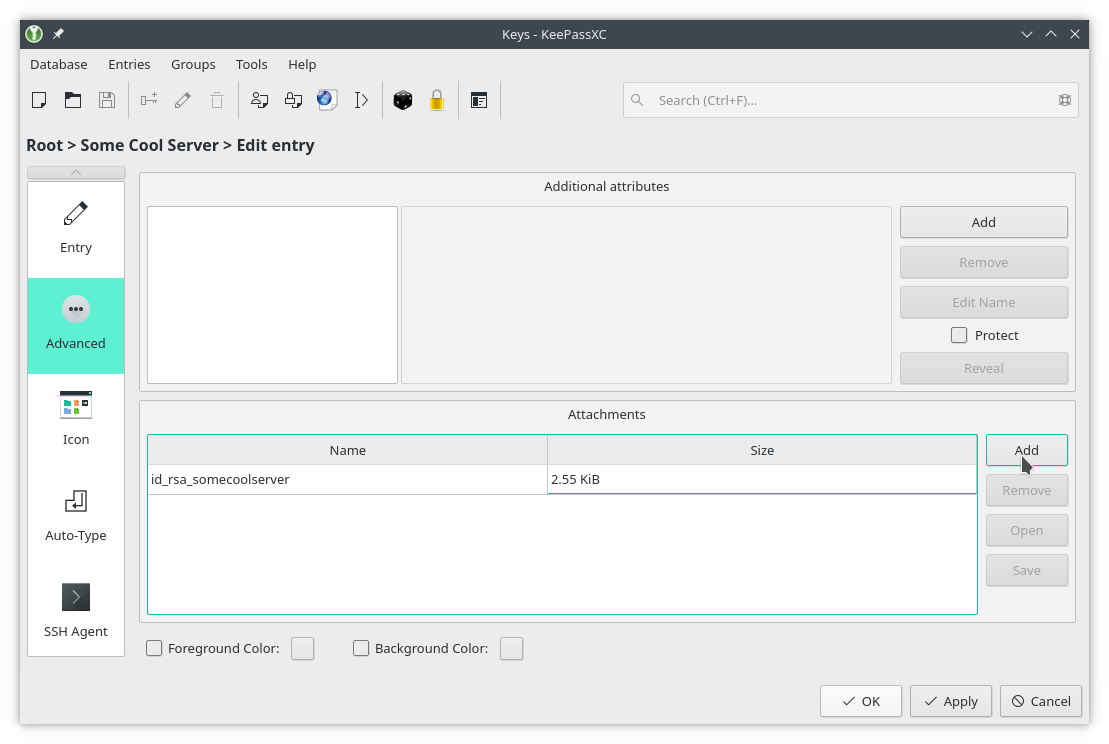 Adding the key as an attachment
Having the keys as an attachment makes it easier to back up, since you only need to make a copy of the Keepass database and all the keys will be kept inside. You can also delete the keys after you added the entry. On the downside, the database will grow bigger and bigger with every attachment, however SSH keys are just text files and have around 4 KiB size.
And the last thing you need to do is to set up the key to be available to the SSH Agent. For that just click the SSH Agent icon:
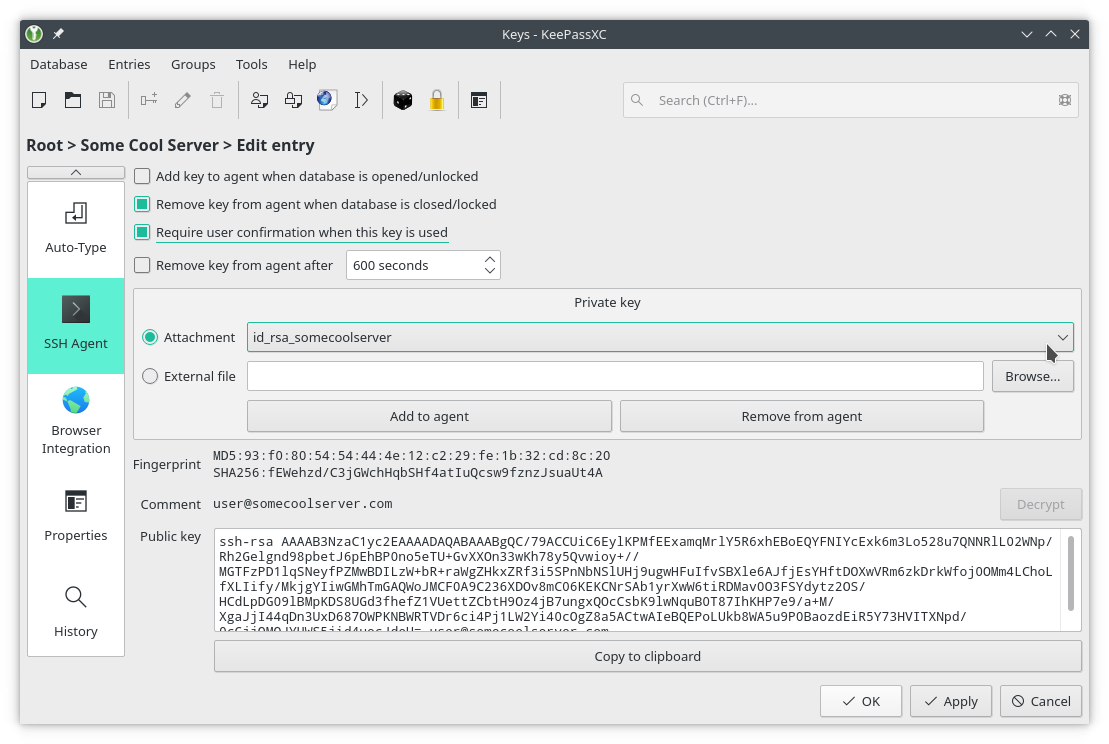 Setting the key available to the SSH Agent
Be careful when checking the Add SSH key to agent when database is
opened/unlocked option if you are forwarding the SSH Agent (the -A flag in
ssh). Please see the section below.
If you choose the option Add SSH key to agent when database is opened/unlocked, your keys will be added to the agent when you unlock your database. If you don’t, you will need to add them manually using the Add to agent button when you want to use them.
If you want to get a confirmation when a key is used (as you should), you will
need to use an askpass software. For example, install the ssh-askpass package.
In Arch Linux, Manjaro or other Arch-based systems:
$ sudo pacman -S x11-ssh-askpassIf you are using wayland, x11-ssh-askpass needs to be configure properly. For it, you can see the following resources:
- Blog Post about askpass in wayland: https://spencerkrum.com/posts/ssh-askpass-wayland/
- Bug on KeepassXC: https://github.com/keepassxreboot/keepassxc/issues/8471
Alternative you can use ksshaskpass from the KDE Projekt. Just install it:
$ sudo pacman -S ksshaskpassAnd set the proper Enviroment Variable, here is an example from the ArchWiki3:
1 |
|
The easiest way to reload the Enviroment Variables is to relogin.
If you get an error saying Agent connection failed after adding the key or when you are trying to add it to the agent, don’t worry just read the next section.
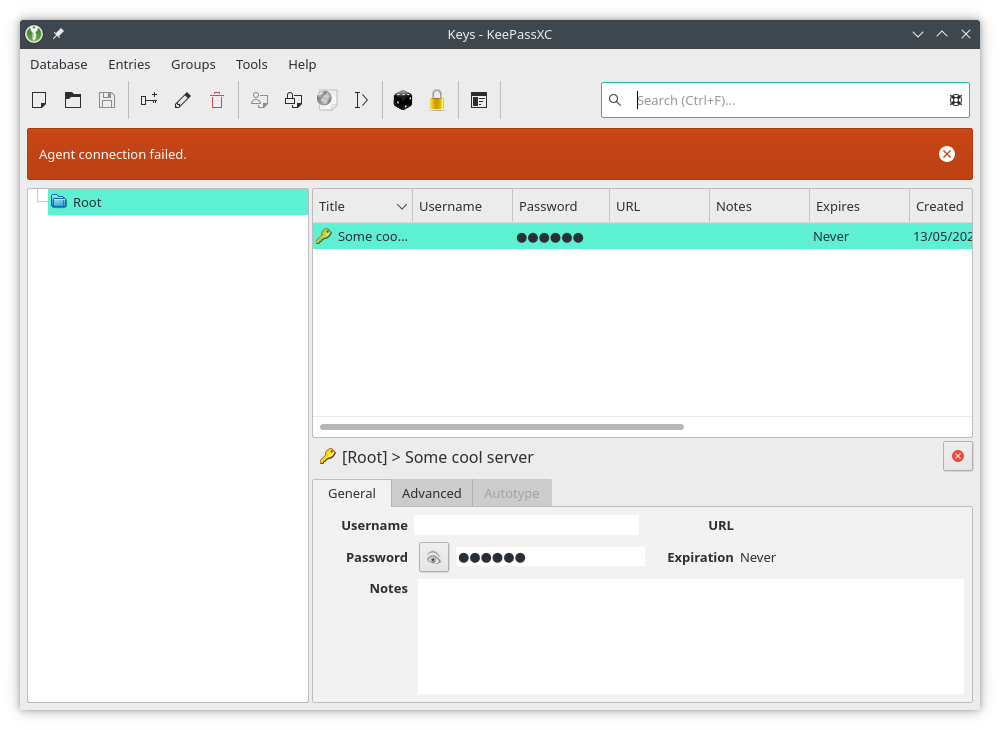 Agent connection failed
Starting SSH Agent with systemd
If you get Agent connection failed, this means that the SSH agent is not running, or is running but the socket is not available for KeepassXC. The best way that I found to solve this problem is using systemd to start and stop the agent.
You can create a systemd User Unit to manage the agent, using this file from the ArchWiki4:
1 |
|
Now you need to tell your shell and Desktop Enviroment where to find the ssh-agent.
If you have a PAM version less than 1.5.0 you could add
SSH_AUTH_SOCK_DEFAULT="${XDG_RUNTIME_DIR}/ssh-agent.socket" to your
~/.pam_environment. Remember that you’ll need to re login for the
.pam_environment changes to take effect.
This however won’t work with newer Distros.5For those cases you just create a
new .conf file in the systemd user variables. Just create the following file
in ~/.config/environment.d/ssh-agent.conf>
1 |
|
Again, the best way to update this is to relogin.
Now KeepassXC and your shell know where to find the ssh-agent. Everything is set up and you can start and stop the SSH Agent using the creted unit:
$ systemctl start --user ssh-agent
$ systemctl stop --user ssh-agent
And if you want the agent to start automatically when you log in:
$ systemctl enable --user ssh-agent Using SSH Agent forwarding
One of the great things about an SSH Agent (independently if you are using
KeepassXC or not) is that you are able to forward the agent to a remote server.
This way you can use your keys in that server without copying them over and
exposing them to theft. This could allow you, for example, to clone a private
repo over SSH into the remote machine without the need of having your keys
there. The only security risk with this approach is that an evil root on that
server could impersonate you during the time that your session is open. For more
information, about SSH Agent forwarding and how this works, you could see this
YouTube video. Basically, you could add the -A flag when connecting to the
server:
$ ssh -A someuser@somecoolserverThe problem is that if you choose to pass all your keys to the Agent automatically (when clicking Add SSH key to agent when database is opened/unlocked), this evil root will have access to all your keys. So I recommend that you check which keys the agent has before doing the forwarding. For that you use this command:
$ ssh-add -l
3072 SHA256:fEWehzd/C3jGWchHqbSHf4atIuQcsw9fznzJsuaUt4A user@somecoolserver.com (RSA)
256 SHA256:Id1KB8aS+K0F4IBFBtwws8BnX8Ayr0zrieeRgJveHsM My git key (ED25519)
3072 SHA256:1DdI/fVVhKU9LM+5n9NRPamg68dYrWFXJwddJEkoZt8 user2@supersecretproject (RSA)
In the example above, I would like to use the first key to authenticate into the
server, and my git key to clone some repos in the server, however I don’t need
the key to the super secret project. So you can remove it individually with
the Remove from agent button from KeepassXC; or you can remove all of them
running ssh-add -D and then add the ones you need.
Optional: Create an SSH config
One thing that is not necessary to use SSH, but could come in really handy is to
specify a config file for your connections. Here you can give a friendly name
to your hosts. You can even specify the user for that server and if you want
to forward the SSH agent (so you don’t have to type -A every time you want to
connect).
For that you create a new file at ~/.ssh/config. Here you have an example file:
1 |
|
Host: a friendly name that you want to use withssh.Hostname: the DNS name or the IP address of the server.User: your username in that server.ForwardAgent: if you want to forward the SSH Agent (defaultno)
For more information and a lot of more options, always check the man page for
ssh_config
-
KeepassXC project: https://keepassxc.org/project/ ↩︎
-
GitLab and SSH keys: https://gitlab.com/help/ssh/README#ed25519-ssh-keys ↩︎
-
ArchWiki KDE Wallet: https://wiki.archlinux.org/title/KDE_Wallet#Using_the_KDE_Wallet_to_store_ssh_key_passphrases ↩︎
-
ArchWiki SSH Agents: https://wiki.archlinux.org/index.php/SSH_keys#Start_ssh-agent_with_systemd_user ↩︎
-
Bug on Arch Linux https://bugs.archlinux.org/task/68945 ↩︎
